Connecting a domain to the site
A domain is the website address that users will use to access your site online. To make your website accessible at your own address (for example, http://mycompany.com), you need to follow two steps:
| If you don’t have a domain yet, you can purchase one from a domain registrar by searching online for “buy a domain.” |
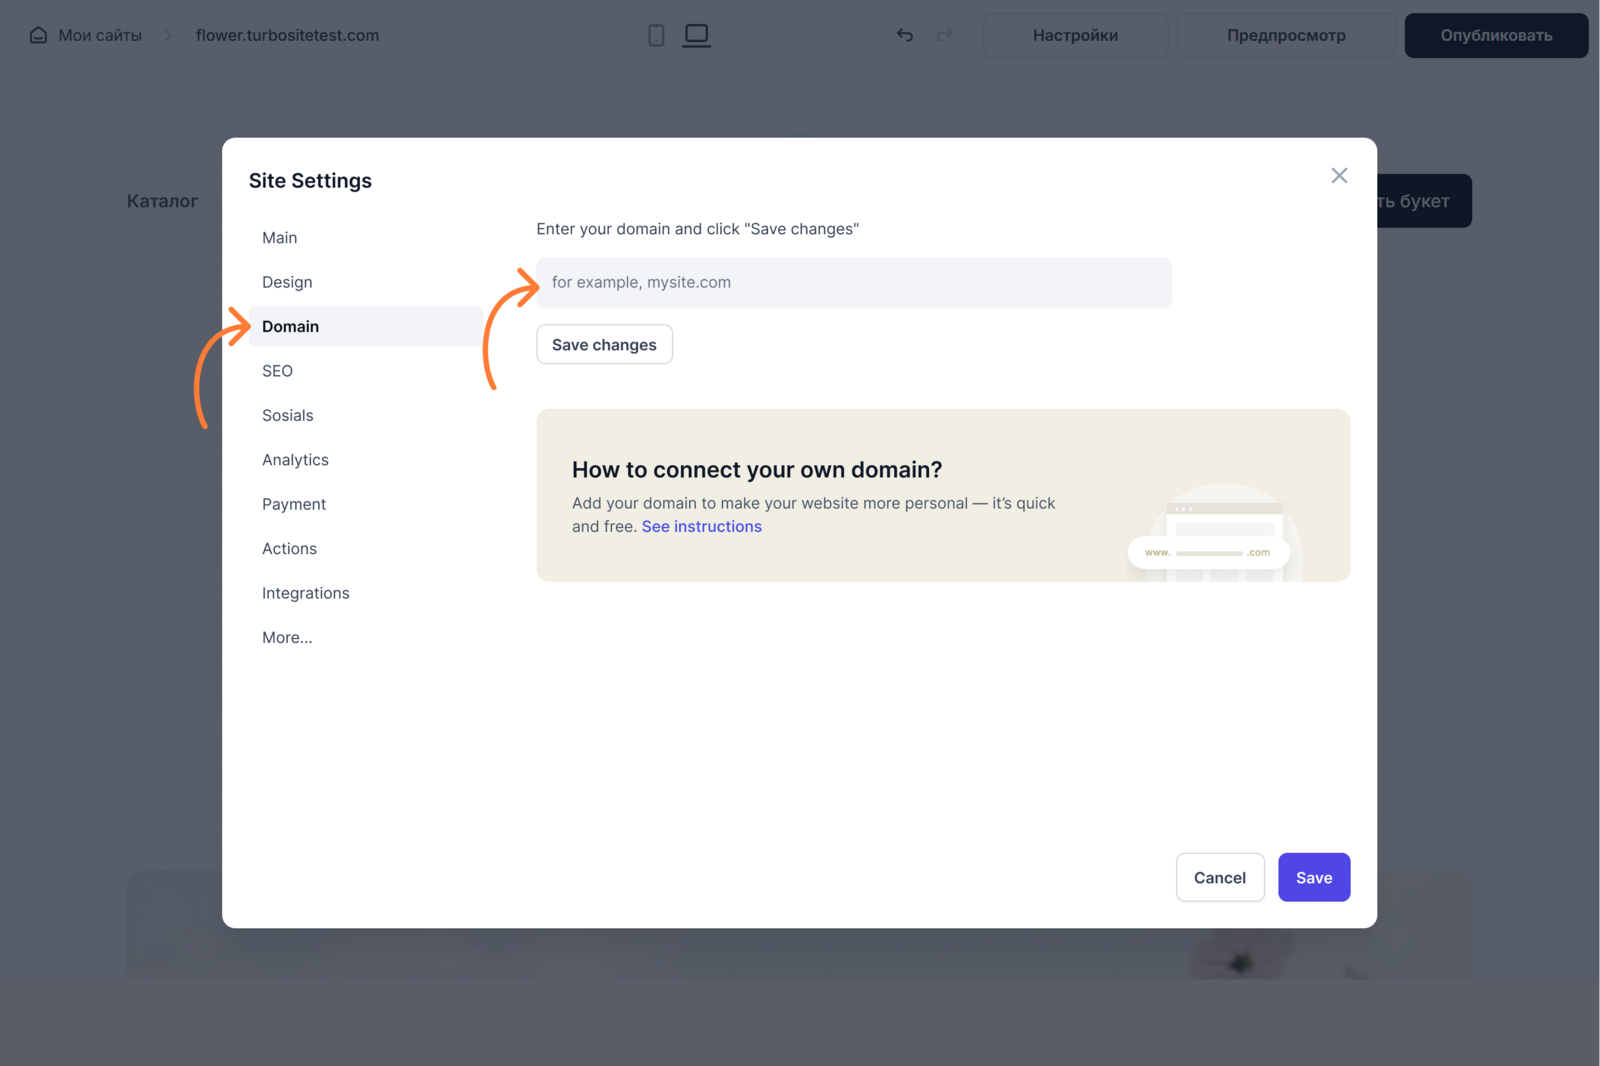
Step 1 - Enter Your Domain in the Website Settings
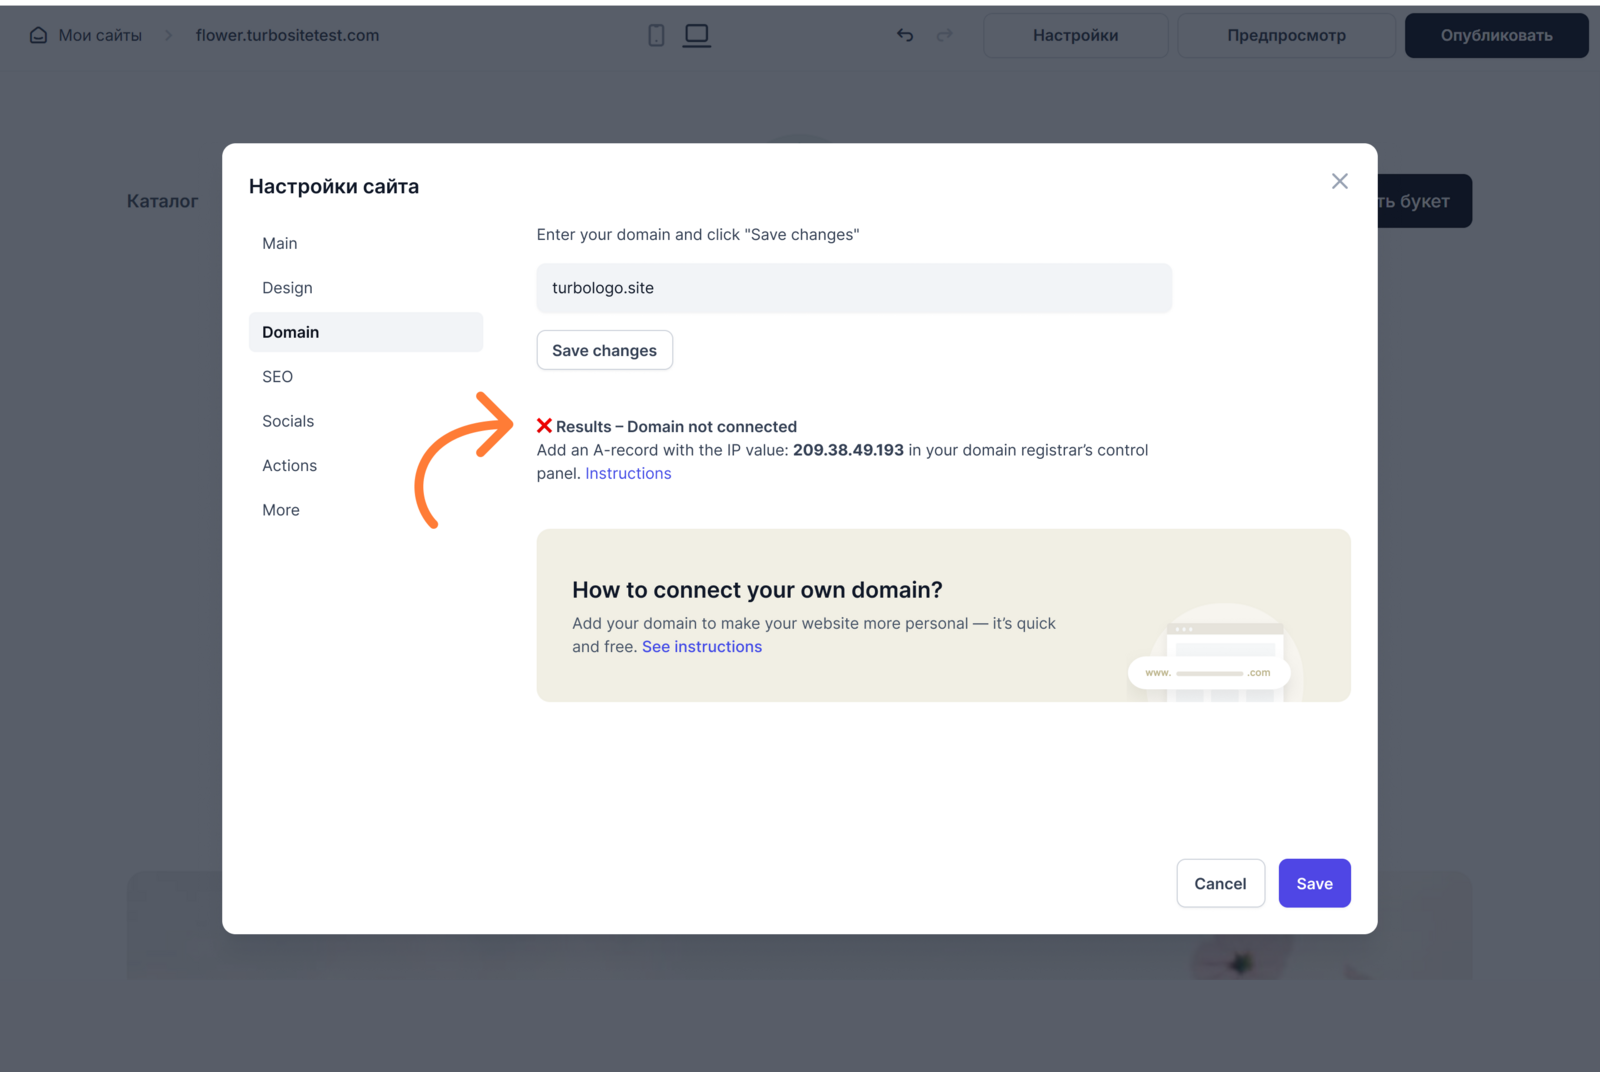
Go to Site Settings → Domain and enter your domain name. Save the changes.
If the domain is not yet connected, you will see a message with the IP address (A-records) that you need to add by following the instructions below

If you have already completed the instructions below, but your domain is not working yet, DNS may still be updating. This process can take up to 24 hours.
Step 2 - Add A-Records for the Domain on the Registrar’s Website
You need to add an A-type record for your main domain. This can be done in the domain control panel (usually called “DNS zone management”).
For the main domain, e.g.: mysite.com
- Log in to your registrar’s account (for example, Namecheap, GoDaddy, etc.)
- Open the domain management section. It’s usually called “Domains,” “DNS,” “DNS Management,” or “DNS Records.”
- Find your domain and open the DNS settings.
Add a new A-record:
- Enter the domain name without www, for example, “mycompany.com”
- Type: A
- Name: @
- Value (IP address): Your Site IP address from Turbologo

Your Site IP address from Turbologo
| If you have other A-records for the main domain, delete them. There should only be one A-record for your domain, otherwise the domain will not work correctly. |
For domains in .com, .net, .org, .ai, or .co zones — use IP 209.38.49.193. For domains in .ru zones — use IP 176.114.88.71
|
| All changes may take from 3 to 24 hours |
Once the records are updated, you will see a message in the website settings that the domain is connected. After publishing, your site will be accessible via your chosen link — you’ll be able to view it and share it with others.

Instructions for Popular Registrars:
International Registrars
GoDaddy
- In your account, select your domain → “DNS.”
- In the “Records” block, click “Add.”
- Set type A, name — @, and IP address. Detailed GoDaddy Instructions GoDaddy Instructions
Namecheap
- Go to the control panel → Domain List → select your domain.
- Go to the “Advanced DNS” tab.
- Add an A-record with name @ and the IP address. Namecheap Instructions
Google Domains
- Select your domain → “DNS” tab.
- In the “Custom records” section, click “Add record.”
- Set type A, name @, and the IP address. Google Domains Instructions
Cloudflare
- Log in, select your site → “DNS” tab.
- Click “Add record,” select type A.
- Set @ and the required IP. Cloudflare Instructions